How to Add Tabs in Blogger Website
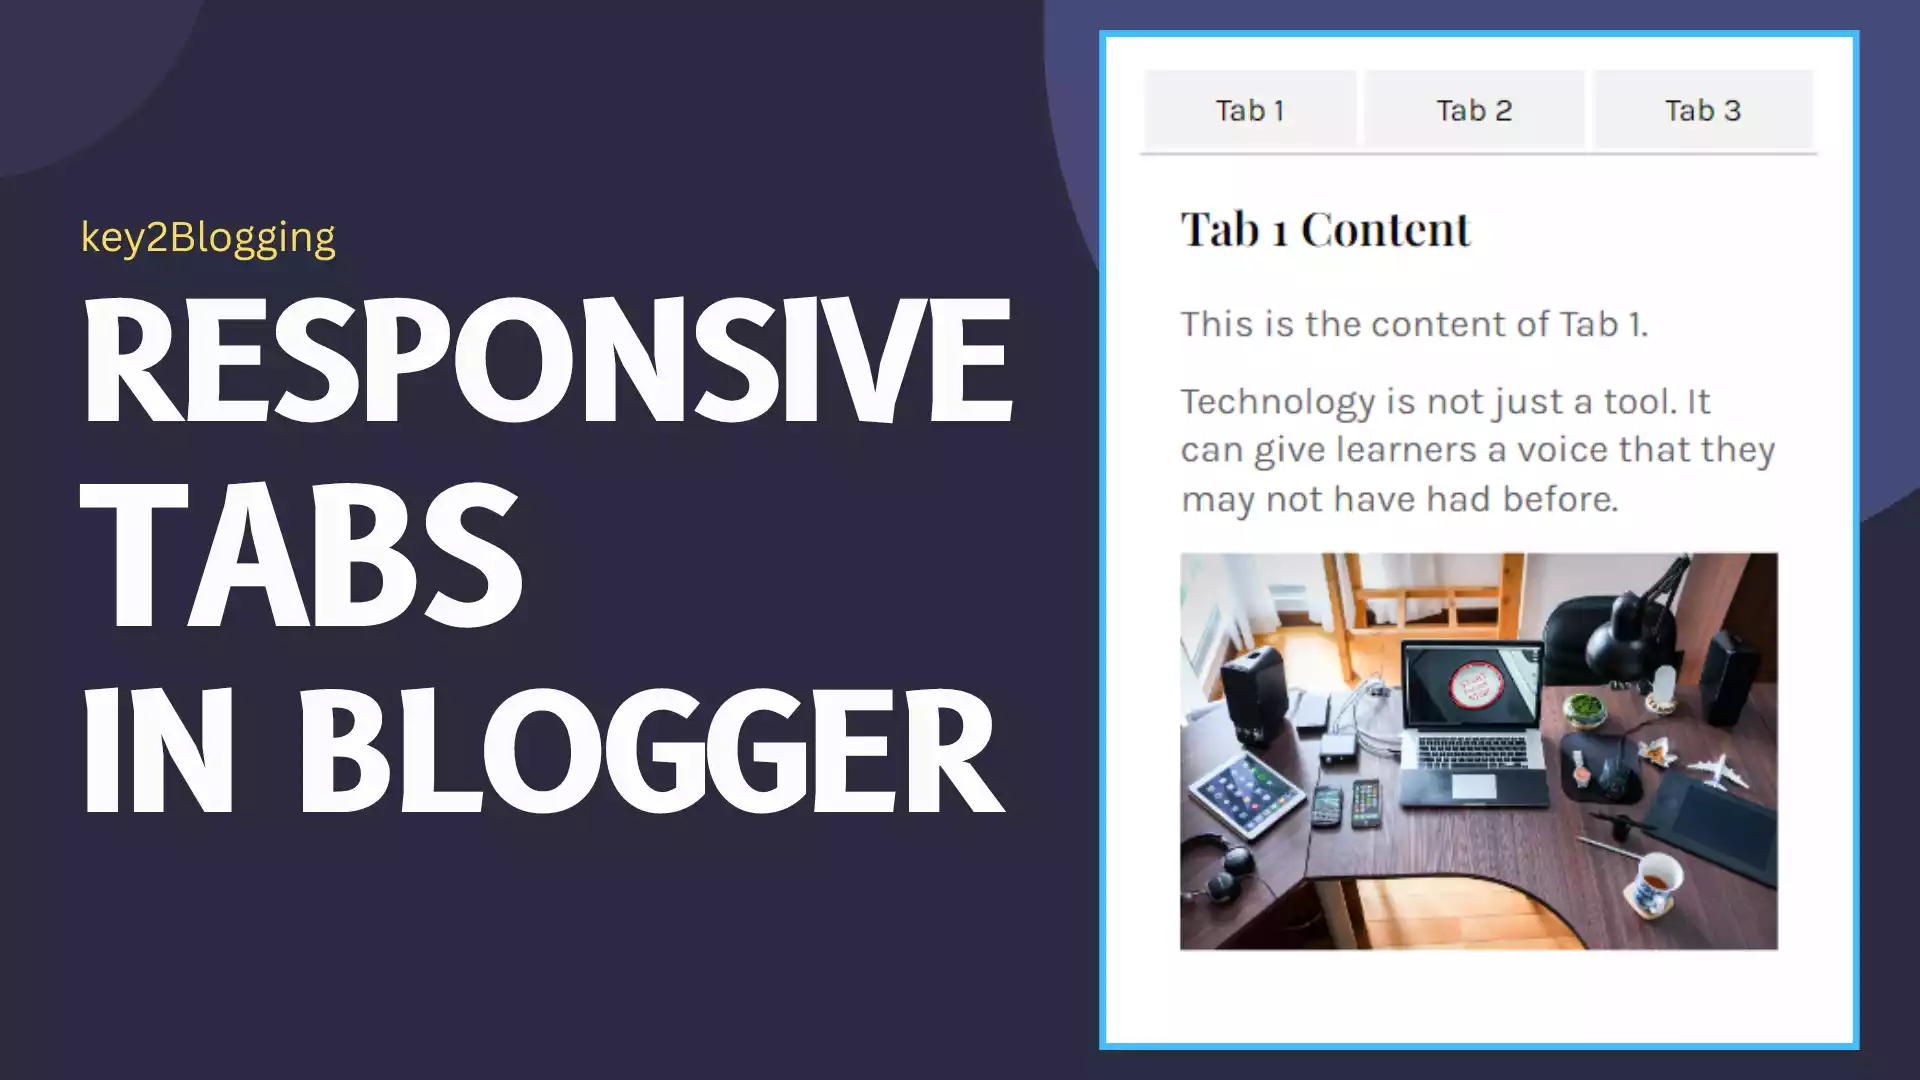
In this Article, You will Learn How to add tabs in Blogger Website. When you have multiple sections with in a same topic, You can either display one after the another or break it into a tab. In this way, You can display your information in more organized manner and it also increases user experience and engagement on the website.
This tab is designed using Simple HTML, CSS & JavaScript code, So You can use it anywhere whether it is in Blogger, WordPress or any other platform.
So, Let’s check How you can add a Simple Tab section to your Blogger Blog post.
For this, Login to your Blogger dashboard and Paste the below code in the HTML section. Make sure to copy all HTML, CSS & JS code.
<div class="tabs">
  <button class="tablinks" onclick="openTab(event, 'tab1')">Tab 1</button>
  <button class="tablinks" onclick="openTab(event, 'tab2')">Tab 2</button>
  <button class="tablinks" onclick="openTab(event, 'tab3')">Tab 3</button>
</div>

<div id="tab1" class="tab-content active">
  <h2>Tab 1 Content</h2>
  <p>This is the content of Tab 1.</p>
  <p>Technology is not just a tool. It can give learners a voice that they may not have had before.</p>
  <img src="https://images.pexels.com/photos/356056/pexels-photo-356056.jpeg?auto=compress&cs=tinysrgb&w=1260&h=750&dpr=1" alt="Image 1">
</div>

<div id="tab2" class="tab-content ">
  <h2>Tab 2 Content</h2>
  <p>This is the content of Tab 2.</p>
  <p>Technology is best when it brings people together.</p>
  <img src="https://images.pexels.com/photos/123335/pexels-photo-123335.jpeg?auto=compress&cs=tinysrgb&w=1260&h=750&dpr=1" alt="Image 2">
</div>

<div id="tab3" class="tab-content">
  <h2>Tab 3 Content</h2>
  <p>This is the content of Tab 3.</p>
  <p>The true sign of intelligence is not knowledge but imagination.</p>
  <img src="https://images.pexels.com/photos/256381/pexels-photo-256381.jpeg?auto=compress&cs=tinysrgb&w=1260&h=750&dpr=1" alt="Image 3">
</div>
Here, You can notice that we have added three tab section, with three buttons and we have three tabs with it’s own unique id like tab1, Tab2 and Tab3.
If you want to add more tabs then you have to create new button element along with it’s div section with a unique id like tab4.
<style>
.tabs {
  display: flex;
}

.tablinks {
  background-color: #f2f2f2;
  color: black;
  border: none;
  outline: none;
  cursor: pointer;
  padding: 10px 20px;
  margin: 2px;
  font-size: 16px;
  transition: background-color 0.3s;
  flex: auto;
}

.tablinks:hover {
  background-color: #ddd;
}

.tab-content {
  display: none;
  padding: 20px;
  border-top: 2px solid #ccc;
  font-size: 19px;
}

 .active {
  display: block;
}
</style>
<script>
function openTab(evt, tabName) {
var i, tabcontent, tablinks;
tabcontent = document.getElementsByClassName("tab-content");
for (i = 0; i < tabcontent.length; i++) {
tabcontent[i].style.display = "none";
}
tablinks = document.getElementsByClassName("tablinks");
for (i = 0; i < tablinks.length; i++) {
tablinks[i].className = tablinks[i].className.replace(" active", "");
}
document.getElementById(tabName).style.display = "block";
evt.currentTarget.className += " active";
}
</script>Once you add the three code in the HTML section, Go ahead and change it's content. You can put any content inside the tabs like the Heading, Paragraph, Images, Blockquote, Codebox etc. As you can see in the Above section, I have put Code box in the tab section along with Paragraph.
Once you add the three code, publish the page and you have successfully added a tab section to your Blogger website. If you still have doubts, feel free to ask me in the comment section.


Hi,
Is there a way to host images with custom domain on blogger. For example, if the custom domain is example.com, can I make my images use the same url instead of Blogger’s default image url setup.
mine is not working. what did I miss? I followed the instructions carefully. I even tried not editing the content.