How to Add a Code box with copy button to your Blogger website
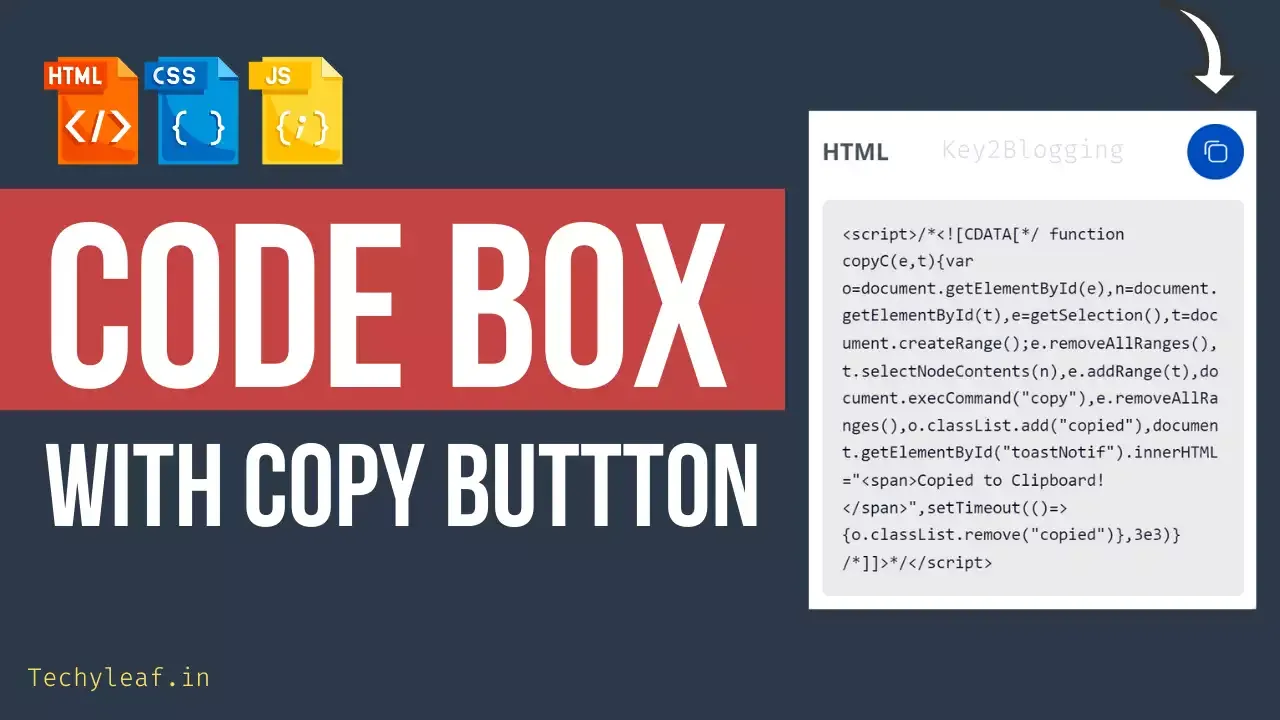
In this Article, i will show you how you can add a code box with a Copy to Clipboard button. So, users can copy long codes provided by you with a single click.
So, in this way, you can improve your user experience and share different HTML, CSS & Javascript codes easily with your readers. The same code box is used to provide codes to you. 🙂
So, without any delay, let’s check the process to add this Advanced code box.
How to Add Code box with a copy to Clipboard button in Blogger
To Add the code box with the copy button, you need to follow the below steps.
Log in to your Blogger dashboard and create a New Blog post.
Now switch to HTML view, copy the below HTML code, and add your code inside the <pre> Tag.
<!-- Code Box 1 -->
<div class="code-container">
<div class="code-header">
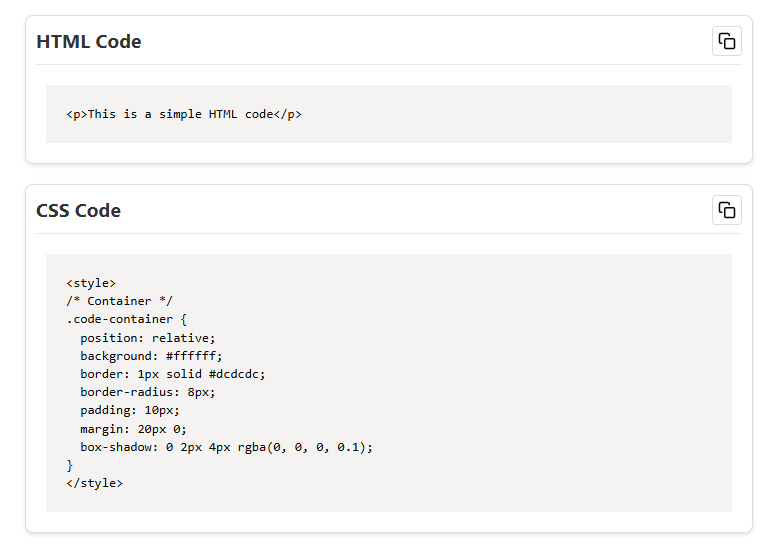
<h3>HTML Code</h3>
<button class="copy-button" data-target="code-content1">
<svg xmlns="http://www.w3.org/2000/svg" class="copy-icon" viewBox="0 0 24 24" fill="none" stroke="currentColor" stroke-width="2" stroke-linecap="round" stroke-linejoin="round">
<rect x="9" y="9" width="13" height="13" rx="2" ry="2"></rect>
<path d="M5 15H4a2 2 0 0 1-2-2V4a2 2 0 0 1 2-2h9a2 2 0 0 1 2 2v1"></path>
</svg>
</button>
</div>
<!--Add Your Parse HTML, CSS and Js code Here-->
<div id="code-content1" class="code-block">
<pre><p>This is a simple HTML code</p></pre>
</div>
</div>
<!-- Code Box 2 (Remove if you don't need) -->
<div class="code-container">
<div class="code-header">
<h3>CSS Code</h3>
<button class="copy-button" data-target="code-content2">
<svg xmlns="http://www.w3.org/2000/svg" class="copy-icon" viewBox="0 0 24 24" fill="none" stroke="currentColor" stroke-width="2" stroke-linecap="round" stroke-linejoin="round">
<rect x="9" y="9" width="13" height="13" rx="2" ry="2"></rect>
<path d="M5 15H4a2 2 0 0 1-2-2V4a2 2 0 0 1 2-2h9a2 2 0 0 1 2 2v1"></path>
</svg>
</button>
</div>
<div id="code-content2" class="code-block">
<pre><style>
/* Container */
.code-container {
position: relative;
background: #ffffff;
border: 1px solid #dcdcdc;
border-radius: 8px;
padding: 10px;
margin: 20px 0;
box-shadow: 0 2px 4px rgba(0, 0, 0, 0.1);
}
</style></pre>
</div>
</div>
<!-- Copy Notification -->
<div id="new-toast" class="new-toast"></div>Now copy the CSS and JavaScript code and paste it just below it. (Note: You can also add it in your theme editor just above </body> tag )
<style>
.code-container {
  position: relative;
  background: #ffffff;
  border: 1px solid #dcdcdc;
  border-radius: 8px;
  padding: 10px;
  margin: 20px 0;
  box-shadow: 0 2px 4px rgba(0, 0, 0, 0.1);
}

.code-header {
  display: flex;
  justify-content: space-between;
  align-items: center;
  padding-bottom: 8px;
  border-bottom: 1px solid #eaeaea;
}

.code-header h3 {
  margin: 0;
  font-size: 1.2rem;
  font-family: system-ui;
  font-weight: 700;
  color: #333;
}

.copy-button {
  background-color: transparent;
  border: 1px solid #dcdcdc;
  border-radius: 4px;
  cursor: pointer;
  padding: 5px;
  transition: background-color 0.3s ease, border-color 0.3s ease;
  display: flex;
  align-items: center;
}

.copy-button:hover {
  background-color: #f9f9f9;
  border-color: #ccc;
}

.copy-button.copied {
  background-color: #28a745;
  border-color: #28a745;
  color: #fff;
}

.copy-icon {
  width: 18px;
  height: 18px;
  color: currentColor;
}

.code-block {
  padding: 10px;
  border-radius: 4px;
  font-family: 'Courier New', monospace;
  font-size: 0.9rem;
  color: #333;
  overflow-x: auto;
  margin-top: 10px;
}

.new-toast {
  position: fixed;
  bottom: 20px;
  left: 50%;
  transform: translateX(-50%);
  background-color: #333;
  color: white;
  padding: 12px 20px;
  font-size: 1rem;
  border-radius: 6px;
  box-shadow: 0 4px 12px rgba(0, 0, 0, 0.2);
  opacity: 0;
  visibility: hidden;
  transition: opacity 0.5s ease, visibility 0s 0.5s;
  z-index: 9999;
}

.new-toast.show {
  opacity: 1;
  visibility: visible;
  transition: opacity 0.5s ease;
}

.new-toast.success {
  background-color: #28a745;
}

.new-toast.error {
  background-color: #dc3545;
}

.new-toast.info {
  background-color: #17a2b8;
}
</style>

<script>
document.addEventListener("DOMContentLoaded", function () {
  const copyButtons = document.querySelectorAll('.copy-button');

  copyButtons.forEach(button => {
    button.addEventListener('click', function () {
      const targetId = button.getAttribute('data-target');
      copyCode(targetId, button);
    });
  });
});

function copyCode(contentId, button) {
  const content = document.getElementById(contentId);
  const range = document.createRange();
  const selection = window.getSelection();

  selection.removeAllRanges();
  range.selectNodeContents(content);
  selection.addRange(range);

  try {
    document.execCommand("copy");
    showToast("Code copied to clipboard!", "success");
    button.classList.add("copied");
  } catch (err) {
    console.error("Failed to copy", err);
    showToast("Failed to copy the code!", "error");
  }

  selection.removeAllRanges();
  setTimeout(() => button.classList.remove("copied"), 2000);
}

function showToast(message, type = "info") {
  const toast = document.getElementById("new-toast");
  toast.textContent = message;
  toast.classList.add("show", type);

  setTimeout(() => toast.classList.remove("show", type), 3000);
}

</script>
Now your code box is added to your Blogger website with the copy to clipboard button. If you want to add multiple code boxes on a single page then you have to copy the HTML code again and change the id on it.
Here is the Preview of the code box.
Note: If you are using HTML or Javascript code then you have to parse the code before adding it to the pre-tag, otherwise, the code box will not show it properly.
So, you can use a Free HTML parse tool to convert your codes and then paste them inside the pre-tag. ( <pre> Your_code_Here </pre> )
You can also further customize the code box by changing the background color, box shadow effects, etc. You can get a variety of Box shadow effects here.
By implementing these changes, you not only make the code easier to read but also improve the user experience, making it more likely that your visitors will share and engage with your content!
New Simple Code Box with Copy button (2025)
    <style>
        .code-container {
            position: relative;
            margin-bottom: 20px;
            border: 1px solid #ddd;
            border-radius: 5px;
            overflow: hidden;
        }

        .copy-btn {
            position: absolute;
            top: 8px;
            right: 8px;
            background-color: #4CAF50;
            color: white;
            border: none;
            padding: 5px 10px;
            border-radius: 4px;
            cursor: pointer;
            font-size: 12px;
            z-index: 1;
        }

        .copy-btn:active {
            background-color: #45a049;
        }

        pre {
            margin: 0;
            padding: 15px;
            background-color: #f0f0f0;
            font-family: Consolas, Monaco, 'Andale Mono', 'Ubuntu Mono', monospace;
            line-height: 1.5;
            white-space: pre-wrap;
            position: relative;
        }
    </style>

    <h2>Multiple Code Boxes with Copy Buttons</h2>

    <!-- Code Box 1 -->
    <div class="code-container">
        <button class="copy-btn">Copy</button>
        <pre>
// Paste your Code 01 here
function greet() {
    alert("Hello from Code Box 1!");
}
greet();
        </pre>
    </div>

    <!-- Code Box 2 -->
    <div class="code-container">
        <button class="copy-btn">Copy</button>
        <pre>
// Paste your Code 02 here
function add(a, b) {
    return a + b;
}
console.log(add(5, 3));
        </pre>
    </div>

    <!-- Code Box 3 -->
    <div class="code-container">
        <button class="copy-btn">Copy</button>
        <pre>
// Paste your Code 03 here
let name = "John Doe";
console.log(`Hello, ${name}!`);
        </pre>
    </div>

    <script>
        document.querySelectorAll('.copy-btn').forEach(button => {
            button.addEventListener('click', () => {
                const codeElement = button.nextElementSibling;
                const codeText = codeElement.innerText.trim();

                navigator.clipboard.writeText(codeText).then(() => {
                    button.textContent = 'Copied!';
                    setTimeout(() => button.textContent = 'Copy', 2000);
                }).catch(err => {
                    console.error('Failed to copy text: ', err);
                });
            });
        });
    </script>
Did this solution work for you? Let us know in the comments below!
If you have any trouble during this process, then I recommend you watch the video carefully. Otherwise, you can also ask in our Telegram Group.
You can Download the Old Style Code box with Copy button Code from here.


That code is right. You just need to change the & symbol between swap and family to like this. &
Join Our Telegram Group and ask your doubts and get updates about new posts and tutorials.
Hi, i want to preload a font like you, but got some error (family must be end with ':') link as='style' href='https://fonts.googleapis.com/css2?display=swap&family=Bebas+Neue' rel='preload'
Please give the right code
This article is so insightful! Thanks for sharing your knowledge.
wow, this worked for me! thanks a lot!